


Automatically linting your files before a git commit helps in keeping your code base clean and prevents known errors from creeping in. It also helps in keeping the code style consistent making it easier for multiple developers to collaborate on a single project.
Starting point
The code examples in this article pick up from this article: https://blog.cntechy.com/how-to-setup-eslint-for-your-typescript-project
Git Hooks
To get this working, we need to use git hooks. Git hooks are scripts that Git can execute before or after certain actions occur. They allow you to customize and automate workflows in your Git repository. Git hooks are located in the .git/hooks directory of your Git repository.
In our case, we will be looking into the pre-commit hook. This hook is invoked before obtaining the proposed commit log message and making a commit.
Let's introduce some linting errors 😁
We are going to add a linting rule to trigger some lint errors which are auto-fixable by eslint. This is so that we can see the git hooks in action. We are adding the rule which would enforce only single quotes in our code base.
To do so, add the following to the .eslintrc.json
"quotes": [ "error", "single" ]
Reference: https://eslint.org/docs/latest/rules/quotes
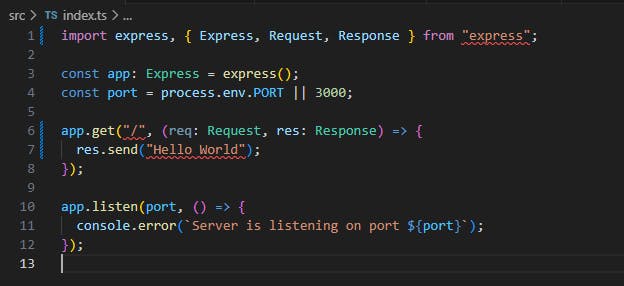
Once we have added this rule, you should see the lint errors in your code editor
Let's create the git hooks using husky and lint-staged npm modules
Husky: This package helps us in managing Git hooks.
Lint-staged: This package allows you to run linters or code formatters on staged files in Git.
Install lint-staged dependency
npm install --save-dev lint-stagedConfigure
lint-stagedin yourpackage.jsonfile:"lint-staged": { "*.ts": "eslint --fix", "*.js": "eslint --fix", }Install husky dependency
 npm install husky --save-dev
 npx husky install
Setup prepare script in package.json
Add the following to the
scriptsin package.json file"prepare": "husky install"When the "npm install" command is run in a project with a "prepare" script, npm executes that script. The script can be used to compile code, generate documentation, optimize assets, or perform any other tasks required to prepare the package for use.
Create Husky Git hooks to run
lint-stagedRun the following commands
 npx husky add .husky/pre-commit "npx lint-staged"
 git add .husky/pre-commit
Try to make a commit
git commit -m "husky and lint-staged setup with eslint"You should see the following output
 $ git commit -m "husky and lint-staged setup with eslint"
 [STARTED] Preparing lint-staged...
 [SUCCESS] Preparing lint-staged...
 [STARTED] Running tasks for staged files...
 [STARTED] package.json — 5 files
 [STARTED] *.ts — 1 file
 [STARTED] *.js — 0 files
 [SKIPPED] *.js — no files
 [STARTED] eslint --fix
 [SUCCESS] eslint --fix
 [SUCCESS] *.ts — 1 file
 [SUCCESS] package.json — 5 files
 [SUCCESS] Running tasks for staged files...
 [STARTED] Applying modifications from tasks...
 [SUCCESS] Applying modifications from tasks...
 [STARTED] Cleaning up temporary files...
 [SUCCESS] Cleaning up temporary files...
 [how-to-automate-linting-before-a-git-commit 129edbb] husky and lint-staged setup with eslint
  4 files changed, 741 insertions(+), 2 deletions(-)
  create mode 100644 .husky/pre-commit
The double quotes in
index.tsfile should have changed to single quotes.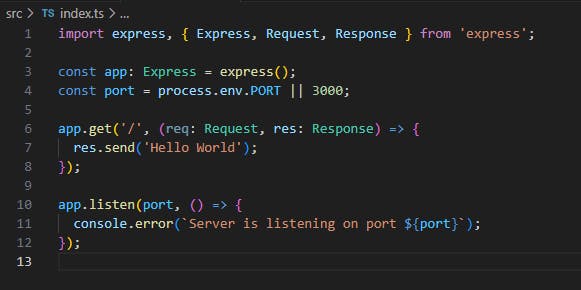
GitHub repo
The final code of this article can be found at github.com/this-santhoshss/nodejs-typescrip..
Branch name: how-to-automate-linting-before-a-git-commit